How Range Hood Installation Reduces Grease and Odors

August 31, 2025

A clean and comfortable kitchen is the heart of every home. But if you’ve ever cooked a big meal and noticed lingering smells or sticky residue on cabinets, you already know how important proper ventilation can be. This is where a range hood makes all the difference. For homeowners in St. John’s, Newfoundland, installing a range hood not only improves air quality but also keeps your kitchen fresher and easier to maintain.


Why Kitchens Collect Grease and Odors

Cooking releases smoke, steam, and microscopic grease particles into the air. Without proper ventilation, these particles stick to walls, cabinets, and countertops, creating a greasy film that is difficult to clean. At the same time, strong cooking odors—like fish, fried food, or spices—can linger long after the meal is over. Over time, this buildup can affect your indoor air quality and even your home’s resale value.


How a Range Hood Helps

Installing a range hood provides several key benefits for your kitchen:

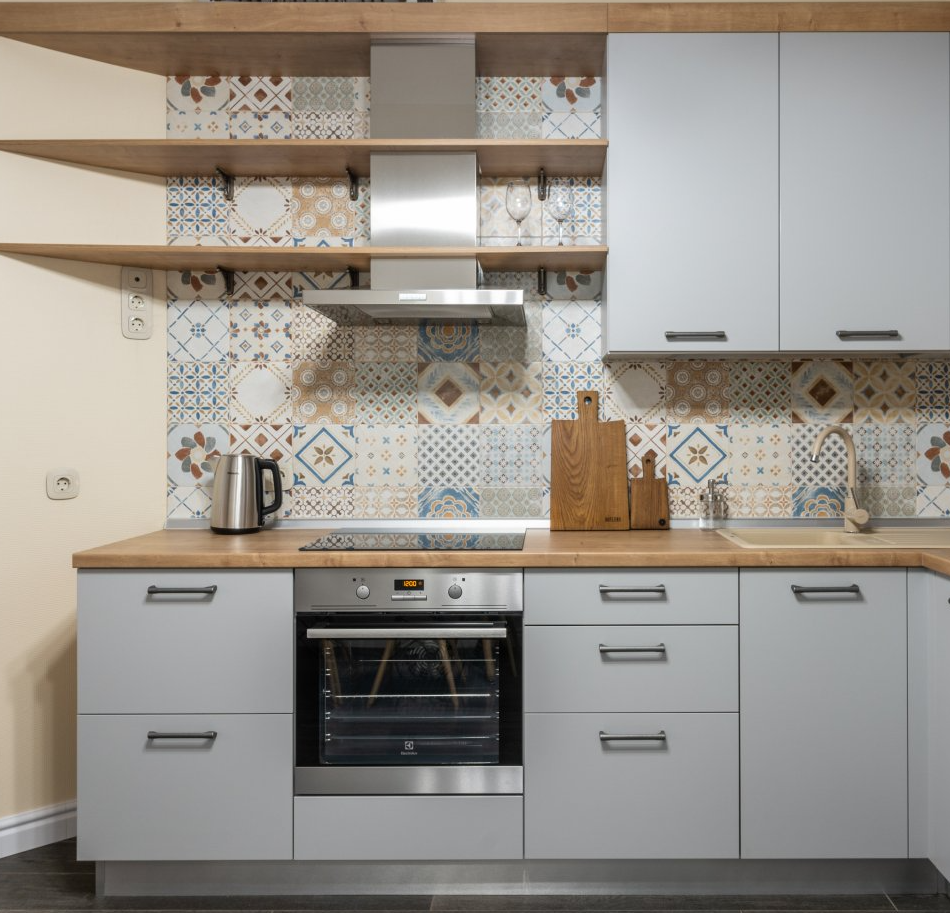
1. Reduces Grease Build-Up

A properly installed hood captures grease particles before they can settle on surfaces. This means fewer sticky cabinets and less time scrubbing.


2. Removes Lingering Odors

Whether you’re simmering seafood chowder or frying bacon, a range hood helps vent out strong smells, leaving your kitchen—and the rest of your home—smelling fresh.


3. Improves Air Quality

Cooking smoke can contain pollutants and allergens. By pulling these out of the air, a range hood makes your home safer and more comfortable, especially for those with asthma or allergies.


4. Adds Value to Your Home

Potential buyers often see a quality range hood as a sign of a well-maintained, functional kitchen. It’s a small upgrade that can make a big impression.


Why Professional Installation Matters

While some homeowners may consider a DIY installation, proper range hood setup requires knowledge of electrical connections, ductwork, and safety codes. An improperly installed hood may not vent correctly—or at all—leaving you with little benefit.


That’s where Handyman Service St. John’s comes in. We provide expert range hood installation to ensure your system works efficiently, giving you maximum grease and odor reduction.


Final Thoughts

Cooking should be enjoyable, not a source of lingering smells and greasy messes. With a professionally installed range hood, you can protect your kitchen, improve air quality, and make cleanup easier.


If you’re ready to upgrade your kitchen with a reliable range hood, contact Handyman Service St. John’s today. We’ll make sure your installation is done right—the first time.

August 24, 2025
When setting up or upgrading your home’s electrical system, one of the most common questions homeowners ask is: How many outlets do I actually need? The truth is, having too few outlets can lead to frustration, tangled extension cords, and even safety hazards. On the other hand, installing too many outlets in the wrong places can be unnecessary and costly. At Handyman Service St. John’s , we help homeowners in St. John’s, Newfoundland, strike the perfect balance. Why the Number of Outlets Matters Electrical outlets are about more than just convenience—they’re essential for safety and functionality. Overloading a single outlet with multiple extension cords or power bars can increase the risk of electrical fires. Having the right number of outlets in the right locations makes your home safer and more practical for everyday living. What the Electrical Code Says According to Canadian electrical code standards: Outlets should be placed every 12 feet along a wall in living areas. Kitchens require outlets above counters, generally every 4 feet, to handle small appliances. Bathrooms must have a GFCI (ground fault circuit interrupter) outlet near the sink for safety. Hallways and stairways also require proper spacing for outlets and lighting. These are minimum requirements—but in today’s tech-heavy households, “minimum” is often not enough. Considering Your Lifestyle How many outlets you need depends largely on how you live: Entertainment setups : TVs, gaming systems, and speakers all need their own dedicated outlets. Home offices : Computers, printers, chargers, and lamps can quickly max out a single outlet. Bedrooms : Beyond lamps and alarm clocks, most bedrooms now need extra outlets for phone chargers, tablets, or even mini-fridges. Outdoor spaces : Adding weatherproof outlets makes it easier to enjoy outdoor lighting, grills, or holiday decorations. Signs You Don’t Have Enough Outlets You may need more outlets if: You rely heavily on extension cords and power strips. Outlets are hidden behind furniture, forcing you to unplug one device to plug in another. Your breakers trip often due to overloaded circuits. The Benefits of Adding More Outlets Upgrading your home with additional outlets improves convenience, boosts safety, and increases property value. Whether you’re renovating, finishing a basement, or just tired of extension cords running across the floor, installing more outlets is a smart investment. Call the Experts in St. John’s If you’re unsure whether your home has enough outlets—or if you’d like to install more— Handyman Service St. John’s can help. We’ll assess your needs, recommend the right locations, and install outlets safely to meet electrical code requirements. 📞 Contact us today to schedule your outlet installation or home electrical upgrade in St. John’s, Newfoundland.
August 18, 2025
Updating or replacing a light switch is one of the simplest ways to refresh a room, improve functionality, or add modern features like dimmers or smart controls. However, working with electricity carries inherent risks. At Handyman Service St. John’s , we prioritize safety while helping homeowners in St. John’s, Newfoundland, upgrade their electrical fixtures. Here are essential safety tips to keep in mind when installing or replacing light switches . 1. Turn Off the Power First Before touching any wires, always shut off the circuit breaker that controls the switch you’ll be working on. Never rely solely on the wall switch to cut power. Use a voltage tester to double-check that no electricity is flowing to the wires before starting work. 2. Understand the Wiring Familiarize yourself with the types of wires in your switch box: Hot wire (usually black or red) – carries current to the switch Neutral wire (white) – completes the circuit Ground wire (green or bare copper) – ensures safety in case of a fault If you’re unsure which wires are which, consult a professional. Incorrect wiring can cause short circuits, fires, or damage to your electrical system. 3. Use the Right Tools Having the correct tools is essential for safe installation. Common tools include: Screwdrivers (flathead and Phillips) Wire strippers Voltage tester Electrical tape Wire nuts Using the wrong tools increases the risk of injury or damaging your electrical system. 4. Follow Manufacturer Instructions Whether installing a standard switch, dimmer, or smart switch, carefully follow the manufacturer’s instructions. Different switches may have specific wiring requirements, and skipping steps can compromise safety or functionality. 5. Avoid Working in Wet Conditions Never work on electrical switches with wet hands, near standing water, or in damp areas. Water is a conductor of electricity and increases the risk of electric shock. 6. Secure Connections Properly Loose wires or connections can lead to sparks, overheating, and fire hazards. Make sure each wire is tightly connected and secured with wire nuts or screws according to code. 7. Call a Professional When Needed Even with careful preparation, some electrical projects can be tricky or dangerous. Handyman Service St. John’s can handle switch replacements, dimmer installations, and smart switch upgrades safely and efficiently. Hiring a professional ensures your home stays safe and your electrical system works properly. Final Thoughts Installing or replacing a light switch can be a manageable DIY project—but safety should always come first. By following these tips, you can reduce risks, protect your home, and enjoy a functional, updated lighting system.  If you’re ready to upgrade your switches safely, contact Handyman Service St. John’s today. Our skilled team provides reliable electrical services throughout St. John’s, Newfoundland, and ensures every installation is done right the first time.
August 10, 2025
When it comes to home improvements, most people think about painting walls, replacing flooring, or buying new furniture. But there’s one upgrade that can instantly change the mood, style, and functionality of your home without a full renovation— updating your light fixtures . At Handyman Service St. John’s , we’ve seen first-hand how the right lighting can completely transform a space in St. John’s, Newfoundland. 1. Create a Fresh, Modern Style Outdated light fixtures can make a room feel stuck in another decade. Whether it’s an old brass chandelier in the dining room or a worn-out ceiling fan in the living area, replacing them with modern designs can instantly refresh your home’s aesthetic. From sleek pendant lights to industrial-inspired fixtures, the right choice will match your décor and elevate the entire room. 2. Enhance the Mood and Atmosphere Lighting isn’t just functional—it sets the tone of a space. Warm lighting creates a cozy, inviting atmosphere for living rooms and bedrooms, while bright, cool lighting works best for kitchens and workspaces. Installing dimmers or layered lighting gives you flexibility, allowing you to change the mood for different occasions. 3. Improve Functionality The right light fixture isn’t only about looks—it can make everyday life easier. For example: Task lighting over kitchen counters makes cooking safer and more enjoyable. Under-cabinet lighting brightens work areas without shadows. Adjustable lamps in offices help reduce eye strain. 4. Increase Home Value Small upgrades like new light fixtures can have a surprising impact on your home’s resale appeal. Potential buyers often notice lighting right away, and a stylish, well-lit home gives the impression of being well-maintained. 5. Energy Efficiency Modern LED light fixtures use significantly less energy than traditional bulbs. This not only lowers your utility bills but also reduces your environmental footprint. It’s a win-win for both style and sustainability. Let Handyman Service St. John’s Help Swapping out light fixtures may sound simple, but it often involves electrical work that should be handled by a professional. Our skilled team at Handyman Service St. John’s can safely install your new lighting, ensure proper wiring, and even help you choose fixtures that best suit your home and lifestyle.  Transform Your Home Today If you’re ready to see just how much of a difference new lighting can make, contact Handyman Service St. John’s . We provide reliable, expert handyman services across St. John’s, Newfoundland, so your home looks and feels exactly the way you want it.
August 2, 2025
Thinking about upgrading your kitchen with a new sink? Whether you're replacing an old, worn-out model or adding a more modern, functional style, proper installation is key. At Handyman Service St. John’s , we specialize in kitchen fixture upgrades across Newfoundland homes, and we know that even a simple sink swap can go a long way in improving your space.  Here’s our step-by-step guide to installing a new kitchen sink —plus when it’s best to call in a pro. 🛠 Step 1: Gather Your Tools and Supplies Before you begin, you’ll need: New kitchen sink (undermount or drop-in) New faucet and strainer (optional but recommended) Silicone caulk Adjustable wrench and basin wrench Plumber’s putty Bucket and towels Tape measure Utility knife If you're installing a deeper or differently shaped sink, you may also need to modify your countertop or plumbing. 🧰 Step 2: Remove the Old Sink Shut off the water supply under the sink. Place a bucket under the drainpipes to catch any residual water. Disconnect the water lines , drainpipe , and garbage disposal (if present). Loosen any clips or brackets holding the old sink in place. Carefully lift out the old sink. You may need to cut through caulk or sealant first. 💡 Pro Tip: Take a photo of the existing plumbing setup before removing anything—it helps during reassembly. 📏 Step 3: Check the Fit Measure the sink opening in your countertop to ensure the new sink fits properly. If it doesn’t, you may need to cut the countertop (especially for farmhouse or apron-front styles). If the fit is good: Clean the countertop area thoroughly. Test-fit the new sink and faucet placement. 🪛 Step 4: Install the Faucet and Drain (Before Mounting the Sink) It’s often easier to attach the faucet , sprayer hose , and sink strainer before placing the sink into the counter. This step is usually done from the top while the sink is out. Use plumber’s putty around the sink strainer and faucet base to ensure a watertight seal. 🧽 Step 5: Mount the Sink Apply a bead of silicone caulk around the edge of the countertop opening. Carefully lower the sink into place, pressing down gently to seal it. If using mounting clips (for drop-in sinks), tighten them from underneath. Wipe away excess caulk. Undermount sinks may require brackets and support while the adhesive cures—this is often a job for professionals. 🚰 Step 6: Reconnect Plumbing and Test Reconnect the water supply lines , drainpipes , and garbage disposal . Slowly turn the water back on and check for leaks under the sink. Tighten any loose connections, and seal gaps if needed. Let everything sit for a few hours to ensure the caulk has cured properly before full use. 🧑‍🔧 When to Call the Pros Installing a sink sounds simple—but if you’re dealing with: Undermount sinks Countertop modifications Older plumbing setups Leaks or pressure issues …it’s best to leave it to a professional. At Handyman Service St. John’s , we handle everything from removal to installation, ensuring your new kitchen sink looks great and works flawlessly—without the stress or mess. Need Help With Your Kitchen Upgrade? We serve homeowners across St. John’s, Newfoundland , offering fast, reliable, and affordable handyman services for kitchens, bathrooms, and beyond. Whether it’s a full renovation or a simple fixture swap, we’re here to help. 📞 Contact Handyman Service St. John’s today to book your kitchen sink installation!
July 26, 2025
When it comes to designing or renovating your kitchen or bathroom, choosing the right tile isn’t just about looks—it’s about durability, safety, and long-term value. At Handyman Service St. John's , we’ve installed hundreds of tiles in homes across St. John’s, Newfoundland , and we know what works best in wet areas. If you’re unsure where to start, here’s our guide to the best tiles for kitchens and bathrooms that combine performance and style. 1. Porcelain Tile: Durable and Water-Resistant Porcelain is a go-to choice for wet areas because of its low water absorption rate , strength, and resistance to stains and scratches. It's denser than ceramic , making it ideal for high-moisture environments like bathrooms and kitchen floors. Why it’s great: Highly water-resistant Comes in various finishes and styles Great for both floors and walls Best use: Shower walls, bathroom floors, kitchen flooring, and backsplashes. 2. Ceramic Tile: Budget-Friendly and Stylish Ceramic tile is slightly more porous than porcelain but still offers solid performance in moisture-prone areas. It’s also more affordable and available in an incredible range of colors and patterns. Why it’s great: Easy to clean Wide variety of designs Good water resistance with proper sealing Best use: Kitchen backsplashes, bathroom walls, and low-traffic bathroom floors. 3. Natural Stone Tile: Elegant but Needs Maintenance For a luxurious look, natural stone tiles like marble, slate, or travertine can be beautiful choices. However, they do require sealing and regular maintenance to remain resistant to moisture and staining. Why it’s great: Unique, natural appearance Adds resale value to your home Variety of textures for slip resistance Best use: Bathroom accent walls, floors with proper sealing, and decorative areas in kitchens. 4. Glass Tile: Perfect for Backsplashes Glass tiles reflect light beautifully and resist moisture, making them a stylish and practical choice for walls, particularly kitchen backsplashes and bathroom accents . Why it’s great: Non-porous and waterproof Easy to clean Available in countless colors and finishes Best use: Accent walls, shower niches, and backsplashes. 5. Vinyl Tile: A Modern Alternative While not a traditional tile, luxury vinyl tile (LVT) has become popular for bathrooms and kitchens. It's waterproof, affordable, and mimics the look of wood or stone without the cold touch or high cost. Why it’s great: 100% waterproof varieties available Warm underfoot Fast and easy installation Best use: Bathroom and kitchen floors in high-traffic areas. Bonus Tip: Don’t Forget About Grout and Slip Resistance Even the best tile can fall short without the right grout and anti-slip features . We recommend epoxy grout for wet areas, as it resists water and stains better than traditional cement grout. And always consider textured or matte finishes to prevent slips in wet environments.  Let the Pros Handle It Installing tile in wet areas takes skill—especially to prevent leaks, uneven layouts, or poor sealing. At Handyman Service St. John's , our local team provides professional tile installation services in St. John’s and surrounding areas , ensuring a flawless finish that lasts for years. Ready to upgrade your bathroom or kitchen with the perfect tile? Contact us today for a free consultation and expert installation.
July 19, 2025
Toilets are one of the most frequently used fixtures in any home or commercial property—but when they’re not installed correctly, they can quietly waste water, drive up utility bills, and even cause hidden damage over time. At Handyman Service St. John’s , we’ve seen how something as simple as improper toilet installation can lead to costly repairs. Whether you’re upgrading an old model or replacing a leaky unit, professional installation ensures your new toilet runs efficiently and safely for years to come. Here’s why getting it done right the first time matters more than you think. 🚽 The Hidden Costs of Improper Installation When a toilet isn’t installed properly, the problems might not be obvious right away—but they’ll show up sooner than you expect. Common issues include: Slow leaks around the base , which can lead to subfloor damage and mold Loose or rocking toilets , often caused by improper leveling or a misaligned flange Ongoing running water , wasting litres of water every day Poor flushing performance due to incorrectly installed tanks or valves In homes across St. John’s , where the weather can shift quickly and moisture builds up easily, even minor water leaks can create long-term damage. That’s why a professionally installed toilet isn’t just about comfort—it’s about protecting your home. 💧 How Proper Installation Saves Water (and Money) According to the City of St. John’s, toilets account for up to 30% of household water use . A poorly sealed or constantly running toilet can waste hundreds of litres of water per week. When installed correctly, your toilet will: Create a tight seal with the floor to prevent water leaks Use water efficiently with each flush (especially with low-flow or dual-flush models) Prevent “phantom flushes” that waste water without anyone using the toilet Comply with local plumbing codes for water conservation 🛠️ What We Do During a Professional Installation At Handyman Service St. John’s , our toilet installation service includes: ✅ Removing the old unit carefully and disposing of it properly ✅ Inspecting and cleaning the flange and wax ring area ✅ Ensuring a level installation to prevent future rocking or seal failure ✅ Installing all components (tank, seat, supply line) with precision ✅ Testing for leaks, stability, and proper flushing ✅ Providing expert tips on maintenance and water-saving settings We use only quality materials, and we stand by our workmanship—because we know your toilet should work reliably from day one. 🏡 Upgrade for Efficiency and Comfort If your toilet is more than 10–15 years old, replacing it with a modern, water-saving model can make a real difference in your utility bill. Many of today’s units offer: Dual-flush options for conserving water Comfort-height designs for easier access Soft-close lids to reduce noise and wear Looking to upgrade your bathroom without a full remodel? Replacing your toilet is a smart, cost-effective first step. 📞 Book Your Toilet Installation with Confidence Whether you’re updating a powder room, outfitting a rental property, or tackling deferred maintenance, Handyman Service St. John’s is here to help.  We bring experience, reliability, and attention to detail to every job—so you can flush with confidence and never worry about what’s happening beneath the surface. Ready to replace your toilet? 📞 Contact us today for a quote or to book your professional installation in St. John’s, Newfoundland .
July 11, 2025
Dreaming of a bathroom refresh but not quite ready to tear everything out? The good news is you don’t need a full renovation to make a major impact. Replacing old or outdated fixtures —like faucets, showerheads, lighting, and towel bars—can dramatically improve both the look and function of your space without the cost or hassle of a full remodel. At Handyman Service St. John’s , we help homeowners across Newfoundland modernize their bathrooms with simple upgrades that deliver big results. If you're looking to update your space on a budget, here’s how to do it the smart, stress-free way. 🔧 What Bathroom Fixtures Can You Replace Easily? Small details make a big difference—especially in a room that gets used every day. The most impactful (and manageable) bathroom fixture upgrades include: Faucets and sink hardware Showerheads and handheld sprayers Toilets and toilet seats Towel bars, robe hooks, and toilet paper holders Vanity mirrors and medicine cabinets Lighting fixtures and vanity lights Bathroom fans and switches These items can typically be swapped out in just a few hours, especially when handled by a professional. 🛠️ Benefits of Replacing Fixtures (Without Renovating) Updating your bathroom fixtures without ripping out tiles or cabinetry offers several major advantages: ✅ Cost-Effective You save thousands by skipping demolition and plumbing relocation. A full renovation might not be necessary when a few smart upgrades can still give your space a brand-new look. ✅ Less Mess and Downtime Replacing fixtures can often be done in one day , with minimal disruption to your home. There’s no need to go without a working bathroom for weeks. ✅ Energy and Water Savings Modern fixtures often come with low-flow technology and LED lighting , helping reduce your utility bills while making your home more eco-friendly. ✅ Instant Style Upgrade New finishes like brushed nickel, matte black, or brass bring modern elegance and cohesion to your bathroom without major construction. 🧰 Pro Tips for a Smooth Fixture Replacement Thinking of upgrading your bathroom on your own? Here are some important tips: Match your finishes : Choose a consistent metal tone across your fixtures for a polished, unified look. Double-check measurements : For faucets, lighting, and mirrors, ensure your new pieces will fit the existing cutouts or mounting hardware. Know your water shut-off valves : Always turn off the water supply before replacing plumbing fixtures. Call a pro when needed : If you’re unsure about electrical or plumbing connections, professional installation is always the safest route. 🧑‍🔧 Why Work with Handyman Service St. John’s? Whether you need help replacing a single fixture or you're planning a full bathroom upgrade over time, our team offers: Fast, professional installation Reliable scheduling and honest pricing Advice on fixture selection and sourcing Clean, efficient workmanship every time We’re proud to serve homeowners throughout St. John’s, Newfoundland , helping you make the most of your home—without the mess or expense of a major renovation. 🚿 Ready to Refresh Your Bathroom? Your dream bathroom might be just a few fixture upgrades away. Let Handyman Service St. John's help you transform your space—quickly, affordably, and with expert care.  📞 Contact us today to schedule your fixture installation or get a free quote!
July 4, 2025
A bathroom vanity is more than just a functional feature—it’s a major part of your bathroom’s style, storage, and everyday convenience. Whether you're upgrading an outdated fixture or completing a full bathroom renovation, installing a new vanity is an exciting step. But before the tools come out and the installation begins, a little preparation can go a long way. At Handyman Service St. John's , we help homeowners across St. John’s, Newfoundland, complete smooth and stress-free vanity installations . Here’s a quick checklist to get your space ready and avoid any last-minute surprises. ✅ 1. Measure Twice—Buy Once Before purchasing a new vanity, measure your space carefully . Take note of: Wall-to-wall width where the vanity will sit Floor depth (especially in tight bathrooms) Existing plumbing locations Mirror and light fixture placement Make sure the vanity you choose fits comfortably without crowding toilets, doors, or showers. If you're upgrading to a larger vanity, double-check that it won’t block outlets or limit accessibility. ✅ 2. Turn Off Water Supply This is a must. Locate your sink’s shut-off valves (usually under the existing vanity) and turn off the water before any removal begins. Test the faucet to ensure the water is completely off. If you’re not sure where the main shut-off is—or if your valves are stuck—it’s a good idea to let a pro handle it. ✅ 3. Clear the Area Remove all items from the vanity cabinet, countertop, and surrounding areas. Move bath mats, towels, bins, and anything hanging near the vanity so your handyman has plenty of space to work safely and efficiently. Tip: Lay down a protective sheet or towel to protect your floor from dust or small debris during removal. ✅ 4. Disconnect Plumbing Removing the old vanity requires disconnecting: Supply lines (hot and cold) The P-trap (drainpipe under the sink) Possibly your faucet, if it’s being reused This step can be messy, so it’s best left to a professional unless you're confident with plumbing basics. ✅ 5. Assess the Wall Condition After removing the old vanity, check the wall for: Mold or mildew Water damage Loose drywall or old mounting hardware This is your chance to repair any hidden issues before installing the new unit. In damp climates like St. John’s, keeping walls dry and sealed is essential for long-term durability. ✅ 6. Check for Level Floors and Studs A new vanity needs a level surface to sit properly and be secured to the wall. If your bathroom floor has shifted or your walls are uneven, your handyman may need to make minor adjustments. Finding the studs behind the drywall ensures the vanity can be anchored safely and securely. ✅ 7. Plan for Vanity Height and Sink Type Modern vanities come in different heights and sink styles—vessel, undermount, integrated, or wall-mounted. Be sure your mirror, backsplash, and lighting align with the type you’ve chosen. A vessel sink, for example, will sit higher and may require lower lighting placement. 🧰 Let Handyman Service St. John's Handle It If this checklist feels overwhelming, don’t worry—we’ve got it covered. At Handyman Service St. John's , we offer professional vanity installation services that include: Safe removal of old vanities Plumbing reconnections Wall repair and touch-ups Clean, precise installation We’ll make sure your new vanity fits perfectly and functions beautifully in your space—no stress, no mess.  📞 Contact us today for a quote or to book your vanity installation in St. John’s, Newfoundland.
By THRO April 20, 2022
What you need to know
By Tori Klein April 18, 2022
Vanity Installation